Siteground Upload Folder Is Not Writable. Export and File Upload Features Will Not Be Functional
If your site is encountering the "Upload: Failed to Write File to Disk" error, it tin can exist more annoying because you're not able to upload new files until yous've fixed.
Fortunately, at that place are a few steps you lot can have to resolve this WordPress error, so you can properly upload files to your Media Library over again. The potential solutions are equally simple as adjusting a few settings via File Transfer Protocol (FTP) and making a phone call to your hosting provider.
In this article, we'll explicate why you may be seeing the "Upload: Failed to Write File to Disk" error on your WordPress site. Then we'll walk you through three potential solutions to become your workflow back on rail.
Allow'south get to it!
Why You're Seeing the "Upload: Failed to Write File to Disk" error in WordPress
Most of the time, the Upload: Failed to Write File to Disk Error is due to a trouble with your site's file permissions. As a security measure, WordPress but enables certain users to modify its files, including the folder that stores uploads.
If the permissions for this folder are fix to prevent users from modifying or 'writing to' it, then your upload attempts will fail. You can chop-chop determine if this is the issue by using the Site Wellness tool.
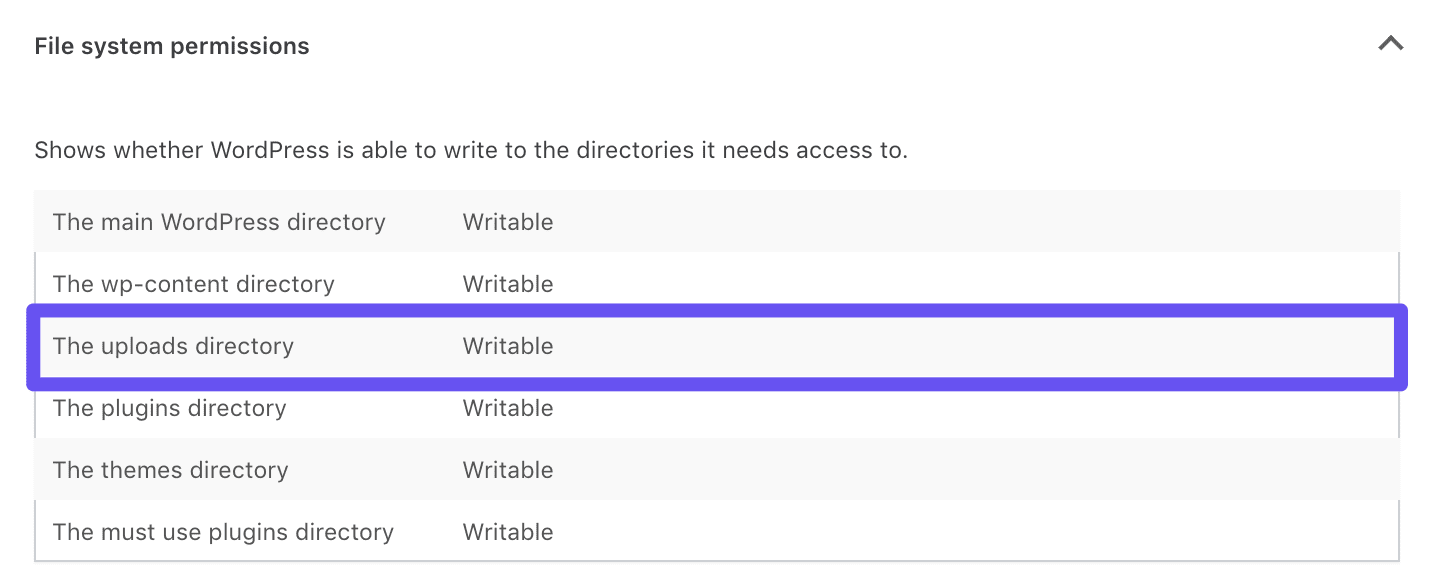
Navigate to Tools > Site Health in your dashboard, and click on the Info tab. The concluding dropdown menu will evidence you the file permissions for a scattering of folders, including the uploads directory:
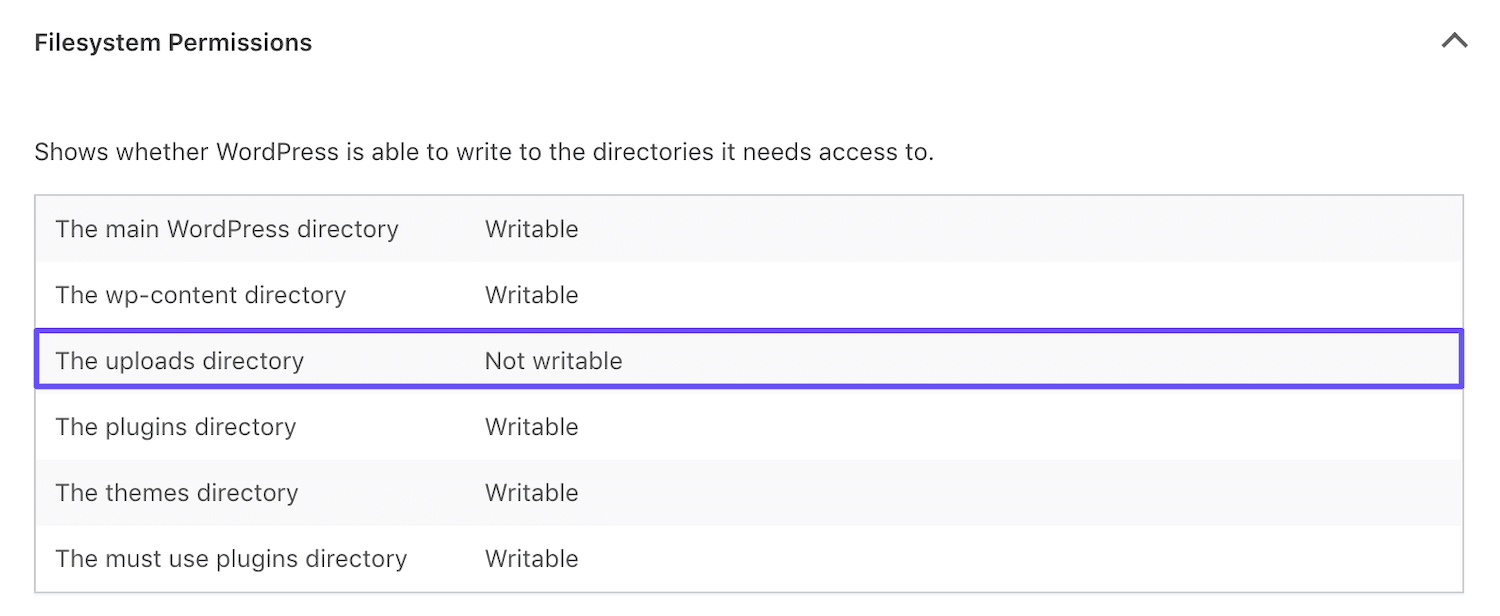
The directory should be gear up to Writable. If information technology'due south set to Not writable, and then yous know you're dealing with a permissions issue.
There are a few other, less common reasons for this trouble. When you add a new media file, WordPress stores it in a temporary folder earlier moving information technology to the uploads directory. If the temporary folder is full or unavailable, you lot may run into the Upload: Failed to Write File to Deejay error.
Additionally, if you've used all the deejay space on your server that was allotted to y'all by your hosting plan, y'all may encounter this error. In this case, it's your server's fashion of telling yous there's no more room for boosted files.
How to Fix the Upload: Failed to Write File to Deejay Fault in WordPress (3 Potential Solutions)
Fixing the Upload: Failed to Write File to Disk error is fairly simple. Hither are three solutions for tackling this issue, based on the root cause.
i. Change the File Permissions of Your Uploads Directory
If you've used the Site Health tool to determine that your Upload: Failed to Write File to Disk fault is due to incorrect permissions, you lot'll need to use File Transfer Protocol (FTP) to fix it. If you lot're unfamiliar with this process, we accept a full guide on how to get started.
Y'all'll need an FTP customer such as FileZilla installed on your reckoner (if you want to show hidden files here is the trick). Yous'll also crave your FTP credentials, which you should be able to find in your hosting account dashboard.
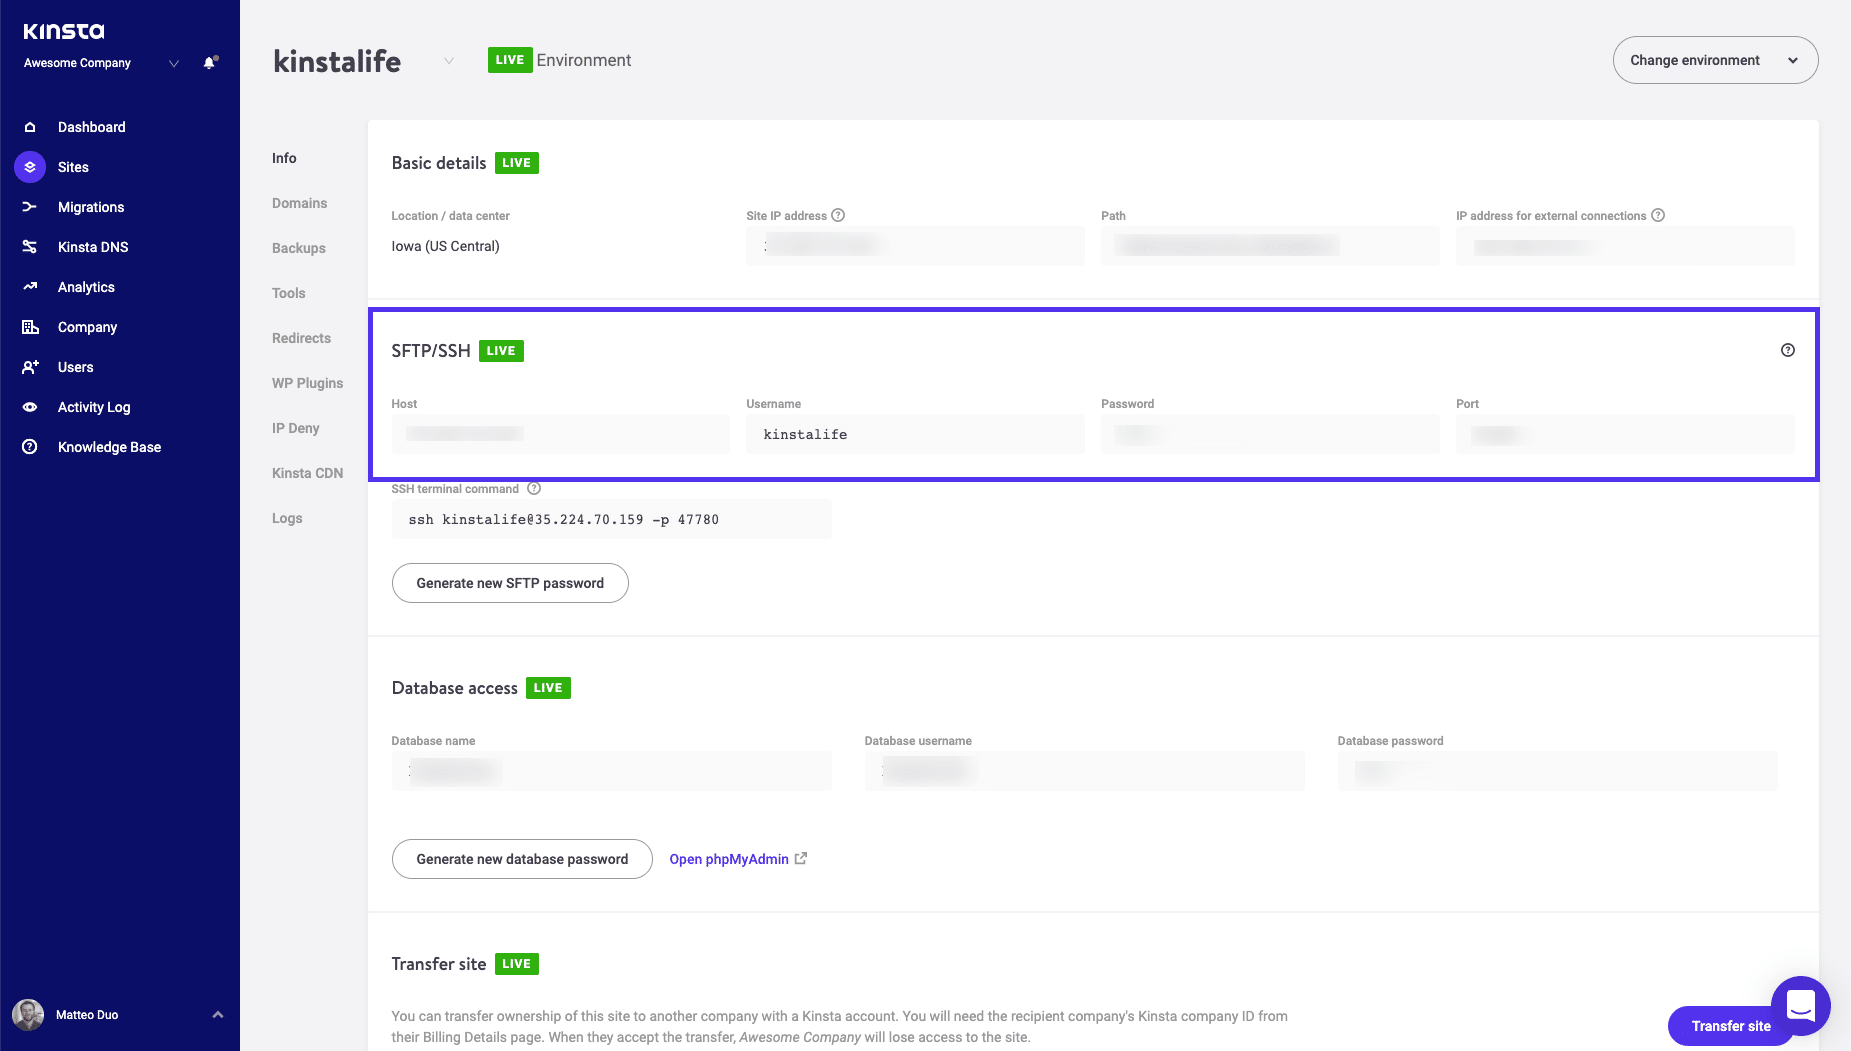
Kinsta customers tin find theirs directly in MyKinsta, past navigating to Sites, clicking on the relevant domain, and looking under SFTP/SSH in the Info tab:
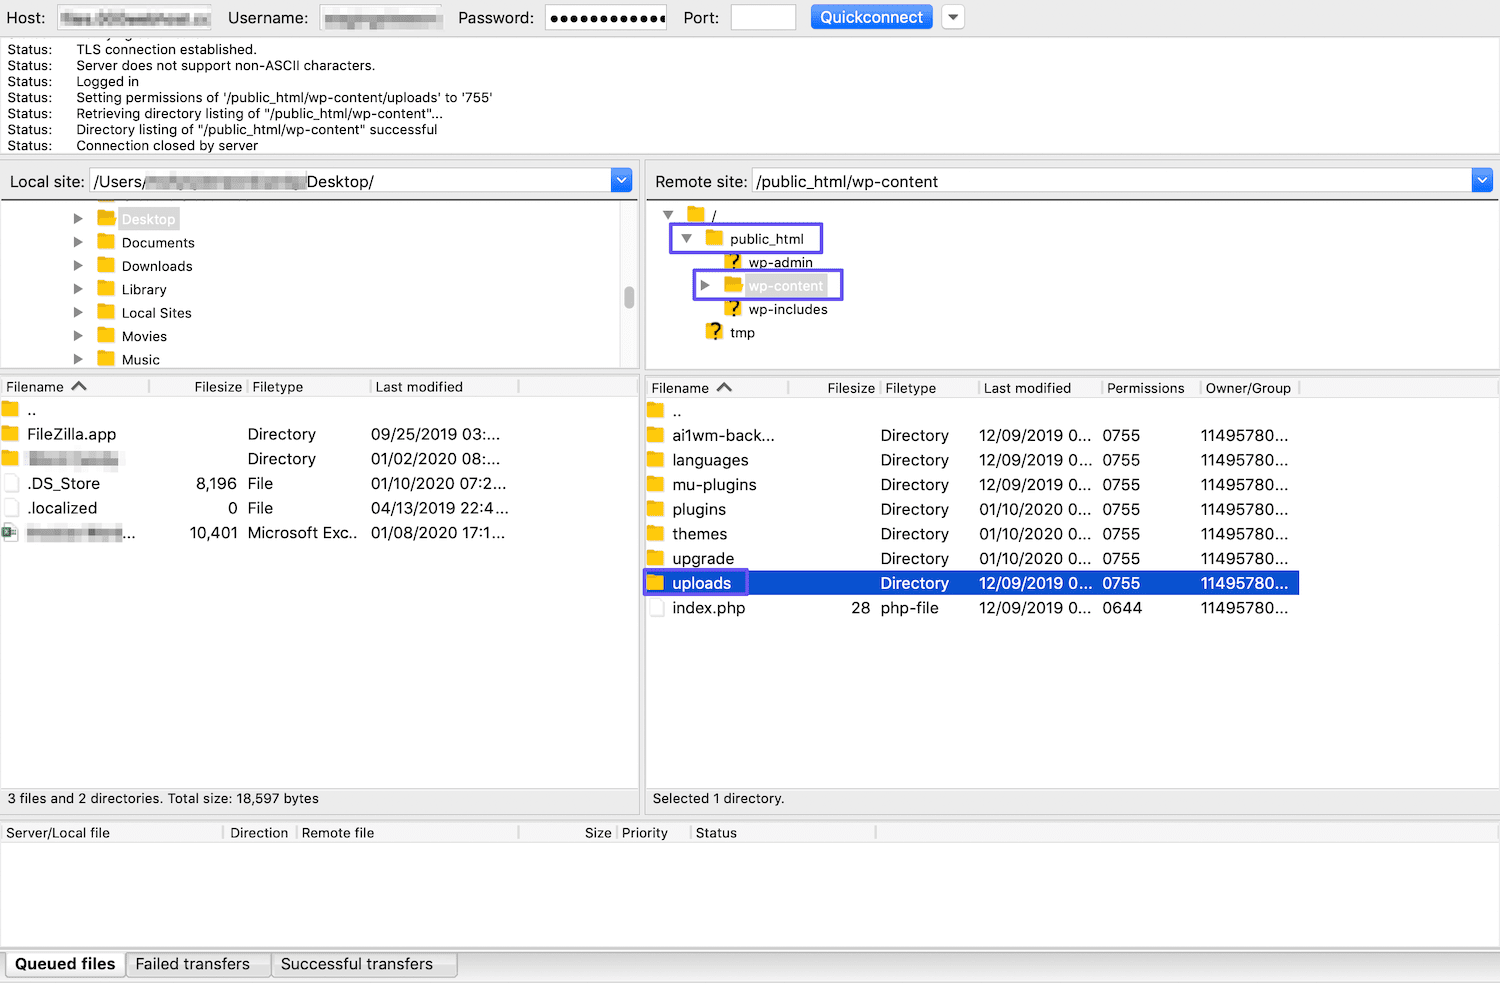
Enter your credentials in your FTP client and launch your connection to the server. And so navigate to your uploads directory in public_html > wp-content:
Subscribe At present
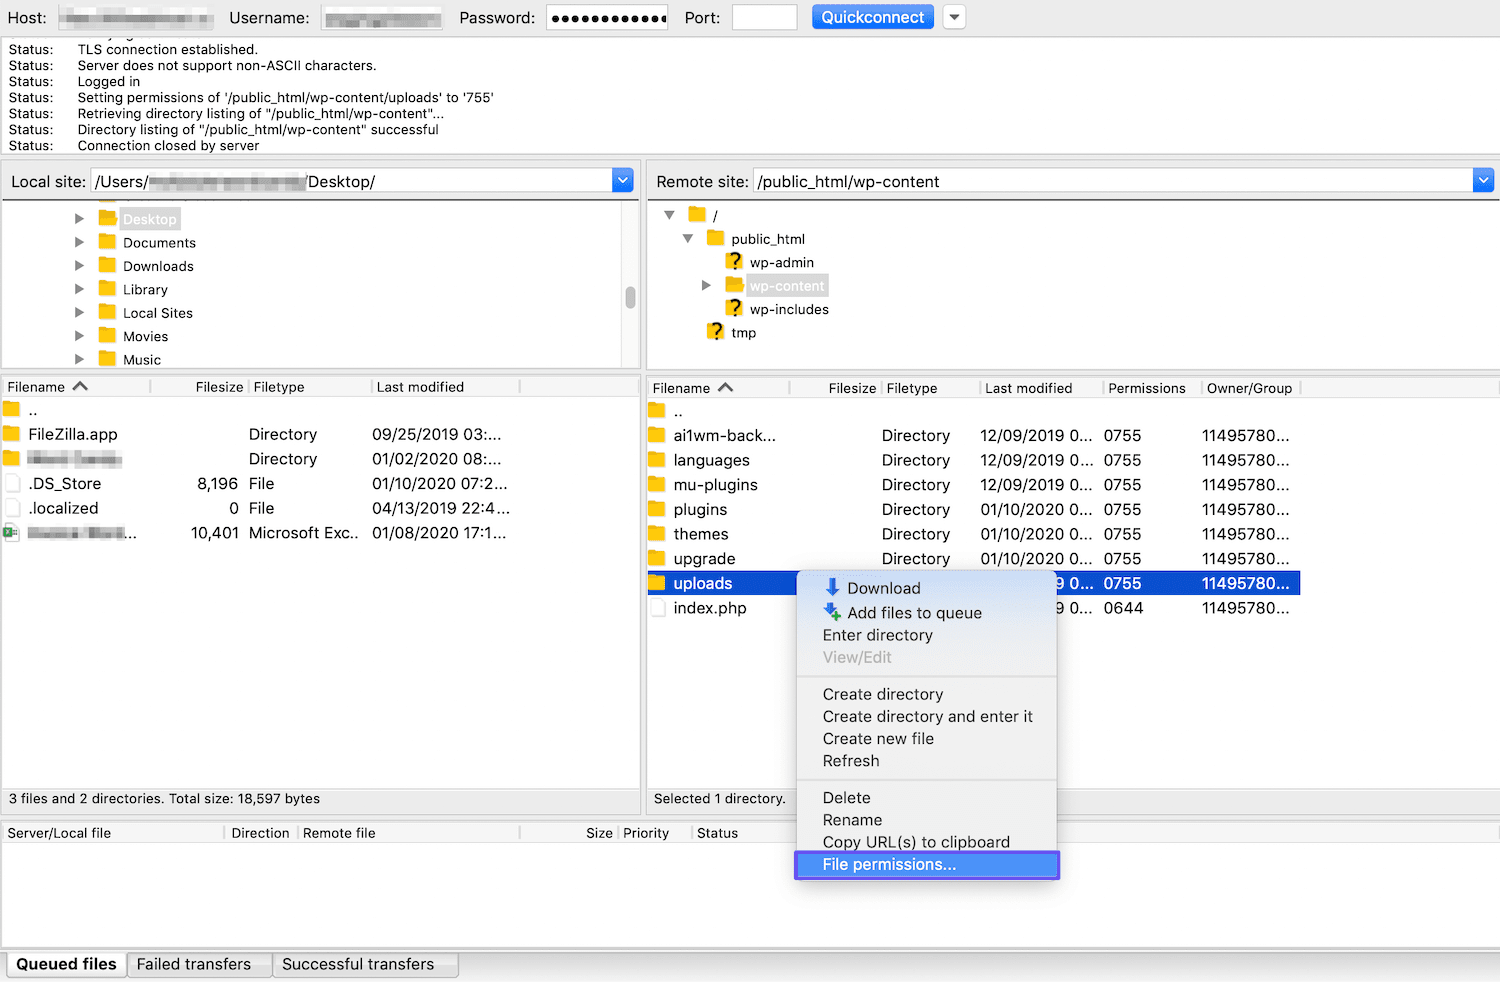
Right-click on the folder, and and then select File Permissions:
A numeric system is used to determine the permissions settings for your site's files. Your uploads directory should be prepare to 755:
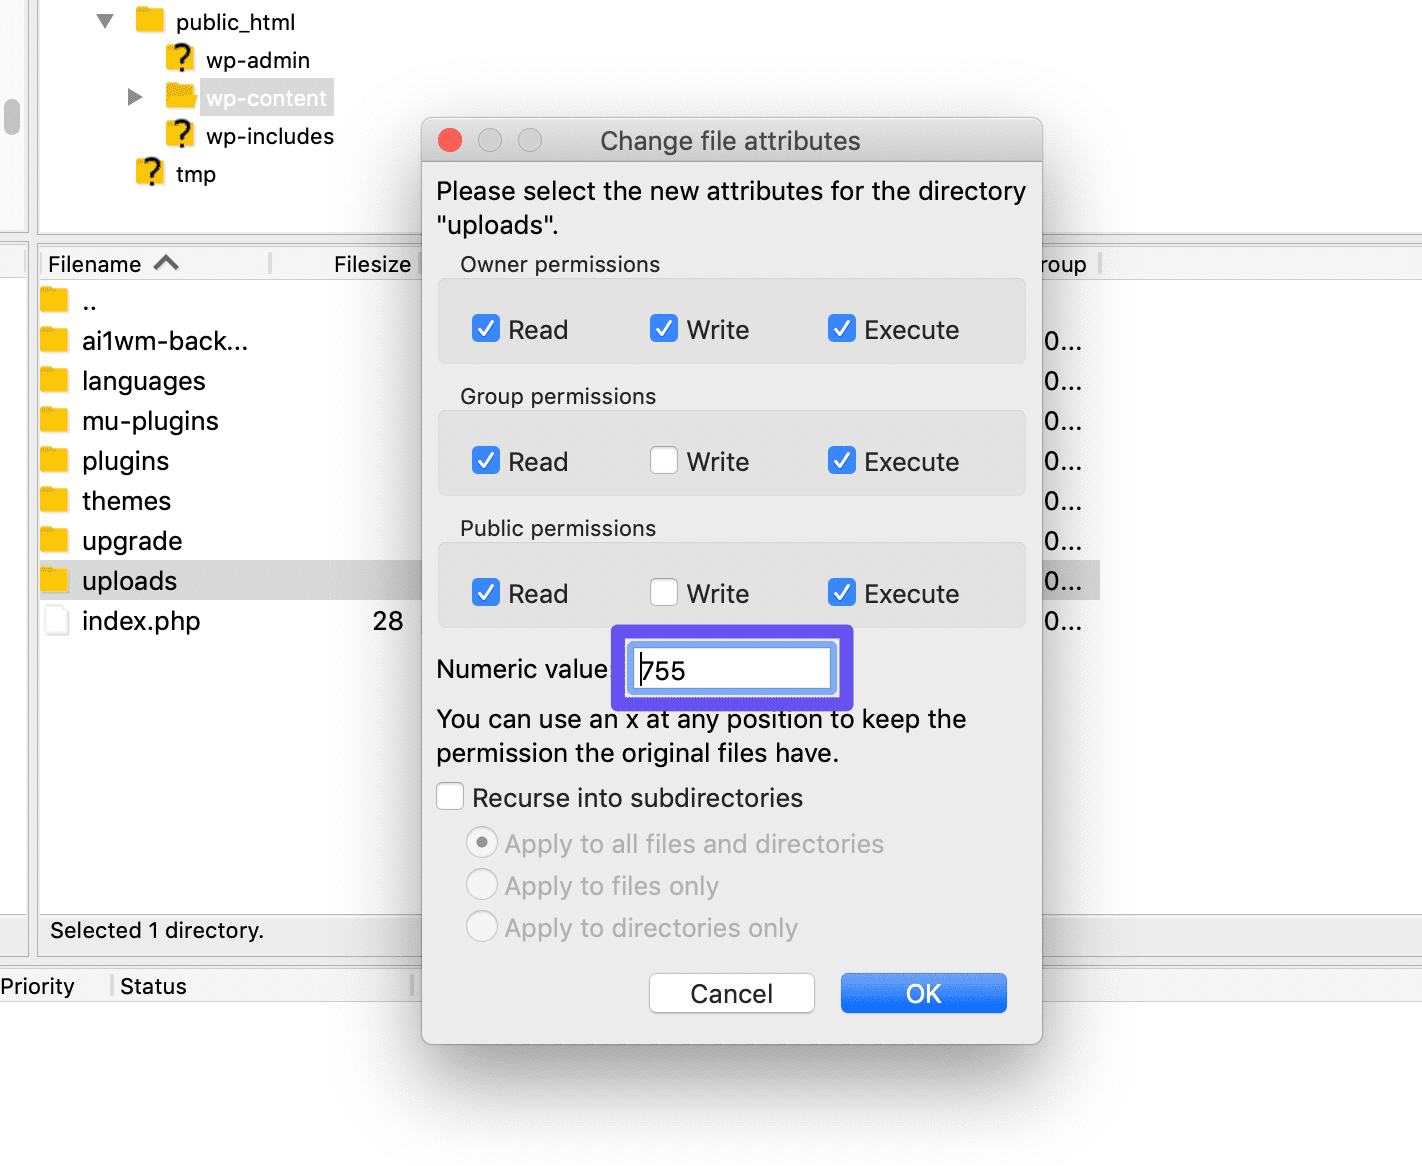
Click on the OK button to save your new permissions settings. Then render to your WordPress site.
If you check the Site Health tool again, your uploads folder should at present be listed as Writable:
At this point, you should be able to upload files to your WordPress site without issue.
2. Empty the WordPress Temporary Binder
If file permissions aren't your trouble, you may want to effort emptying the temporary folder WordPress uses to upload files to your site. Unfortunately, you lot can't access this directory via FTP.
Instead, you lot'll need to contact your hosting provider to assist you with this task. The support team should exist able to access this subconscious file on your server and determine if it's full or otherwise causing the Upload: Failed to Write File to Disk fault.
3. Upgrade Your Hosting Plan to Access More Disk Space
It's also possible that you lot've used up all the disk space provided by your hosting plan (here's how to cheque deejay usage in WordPress). This is particularly probable if your site is on a shared server and has grown over time through the improver of posts and pages, plugins, themes, so on.
Most hosting accounts will list how much deejay space y'all're currently using. Kinsta customers can find this information in their MyKinsta dashboard, under Resources usage:
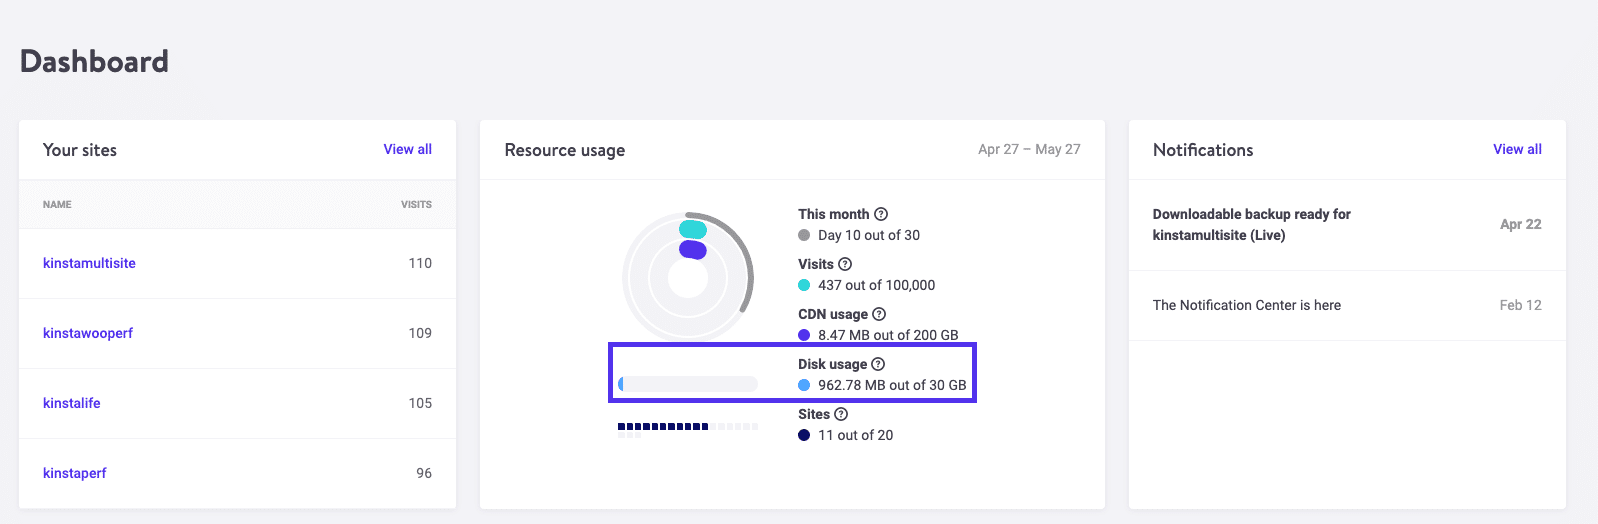
Fortunately, the solution to this problem is very simple. If you're maxing out your site's current allocation of disk space, all you need to practise is upgrade to a new hosting plan. Your provider should offer articulate documentation on how to switch over to a new package.
Summary
Resolving the Upload: Failed to Write File to Deejay error in WordPress speedily is key to making sure this upshot doesn't ho-hum downwards your business. To prepare this error, hither are the three most common potential solutions:
- Cheque the file permissions of your uploads directory.
- Empty the WordPress temporary folder.
- Upgrade your hosting programme to access more than deejay infinite.
Save time, costs and maximize site performance with:
- Instant help from WordPress hosting experts, 24/7.
- Cloudflare Enterprise integration.
- Global audience reach with 29 data centers worldwide.
- Optimization with our congenital-in Awarding Performance Monitoring.
All of that and much more, in one plan with no long-term contracts, assisted migrations, and a xxx-twenty-four hour period-coin-dorsum-guarantee. Check out our plans or talk to sales to observe the program that's correct for you.
bergeronkelin1954.blogspot.com
Source: https://kinsta.com/knowledgebase/wordpress-failed-to-write-file-to-disk/
0 Response to "Siteground Upload Folder Is Not Writable. Export and File Upload Features Will Not Be Functional"
Post a Comment